0%

使用StyleGAN训练自己的数据集.md

参考: https://www.gwern.net/Faces#compute

1 数据准备

执行StyleGAN的最大难点在于准备数据集,不像其他的GAN可以接受文件夹输入,它只能接收.tfrecords作为输入,它将每张图片不同分辨率存储为数组。因此,输入文件必须是完美正态分布的,通过特定的dataset_tools.py工具将图片转成.tfrecords,这会导致实际存储尺寸达到原图的19倍。

注意:

  • StyleGAN的数据集必须由相同的方式组成,$512\times 512$ 或 $1024\times 1024$( $513\times 513$就不行)
  • 必须是相同的颜色空间,不能既有sRGB又有灰度图JPGs。
  • 文件类型必须是与你要重新训练的模型所使用的图像格式相同的,比如,你不能用PNG图片来重新训练一个用JPG格式图像的模型。
  • 不可以有细微的错误,比如CRC校验失败。

2 准备脸部数据

  1. 下载原始数据集 Danbooru2018
  2. 从Danbooru2018的metadata的JSON文件中抽取所有的图像子集的ID,如果需要指定某个特定的Danbooru标签,使用jq以及shell脚本
  3. 将原图裁剪。可以使用nagadomi的人脸裁剪算法,普通的人脸检测算法无法适用于这个卡通人脸。
  4. 删除空文件,单色图,灰度图,删掉重名文件
  5. 转换成JPG格式
  6. 将所有图片上采样到目标分辨率即$512\times 512$,可以使用 waifu2x
  7. 将所有图像转换成 $512\times 512$的sRGB JPG格式图像
    8.可以人工筛选出质量高的图像,使用findimagedupes删除近似的图像,并用预训练的GAN Discriminator过滤掉部分。
  8. 使用StyleGAN的data_tools.py将图片转换成tfrecords

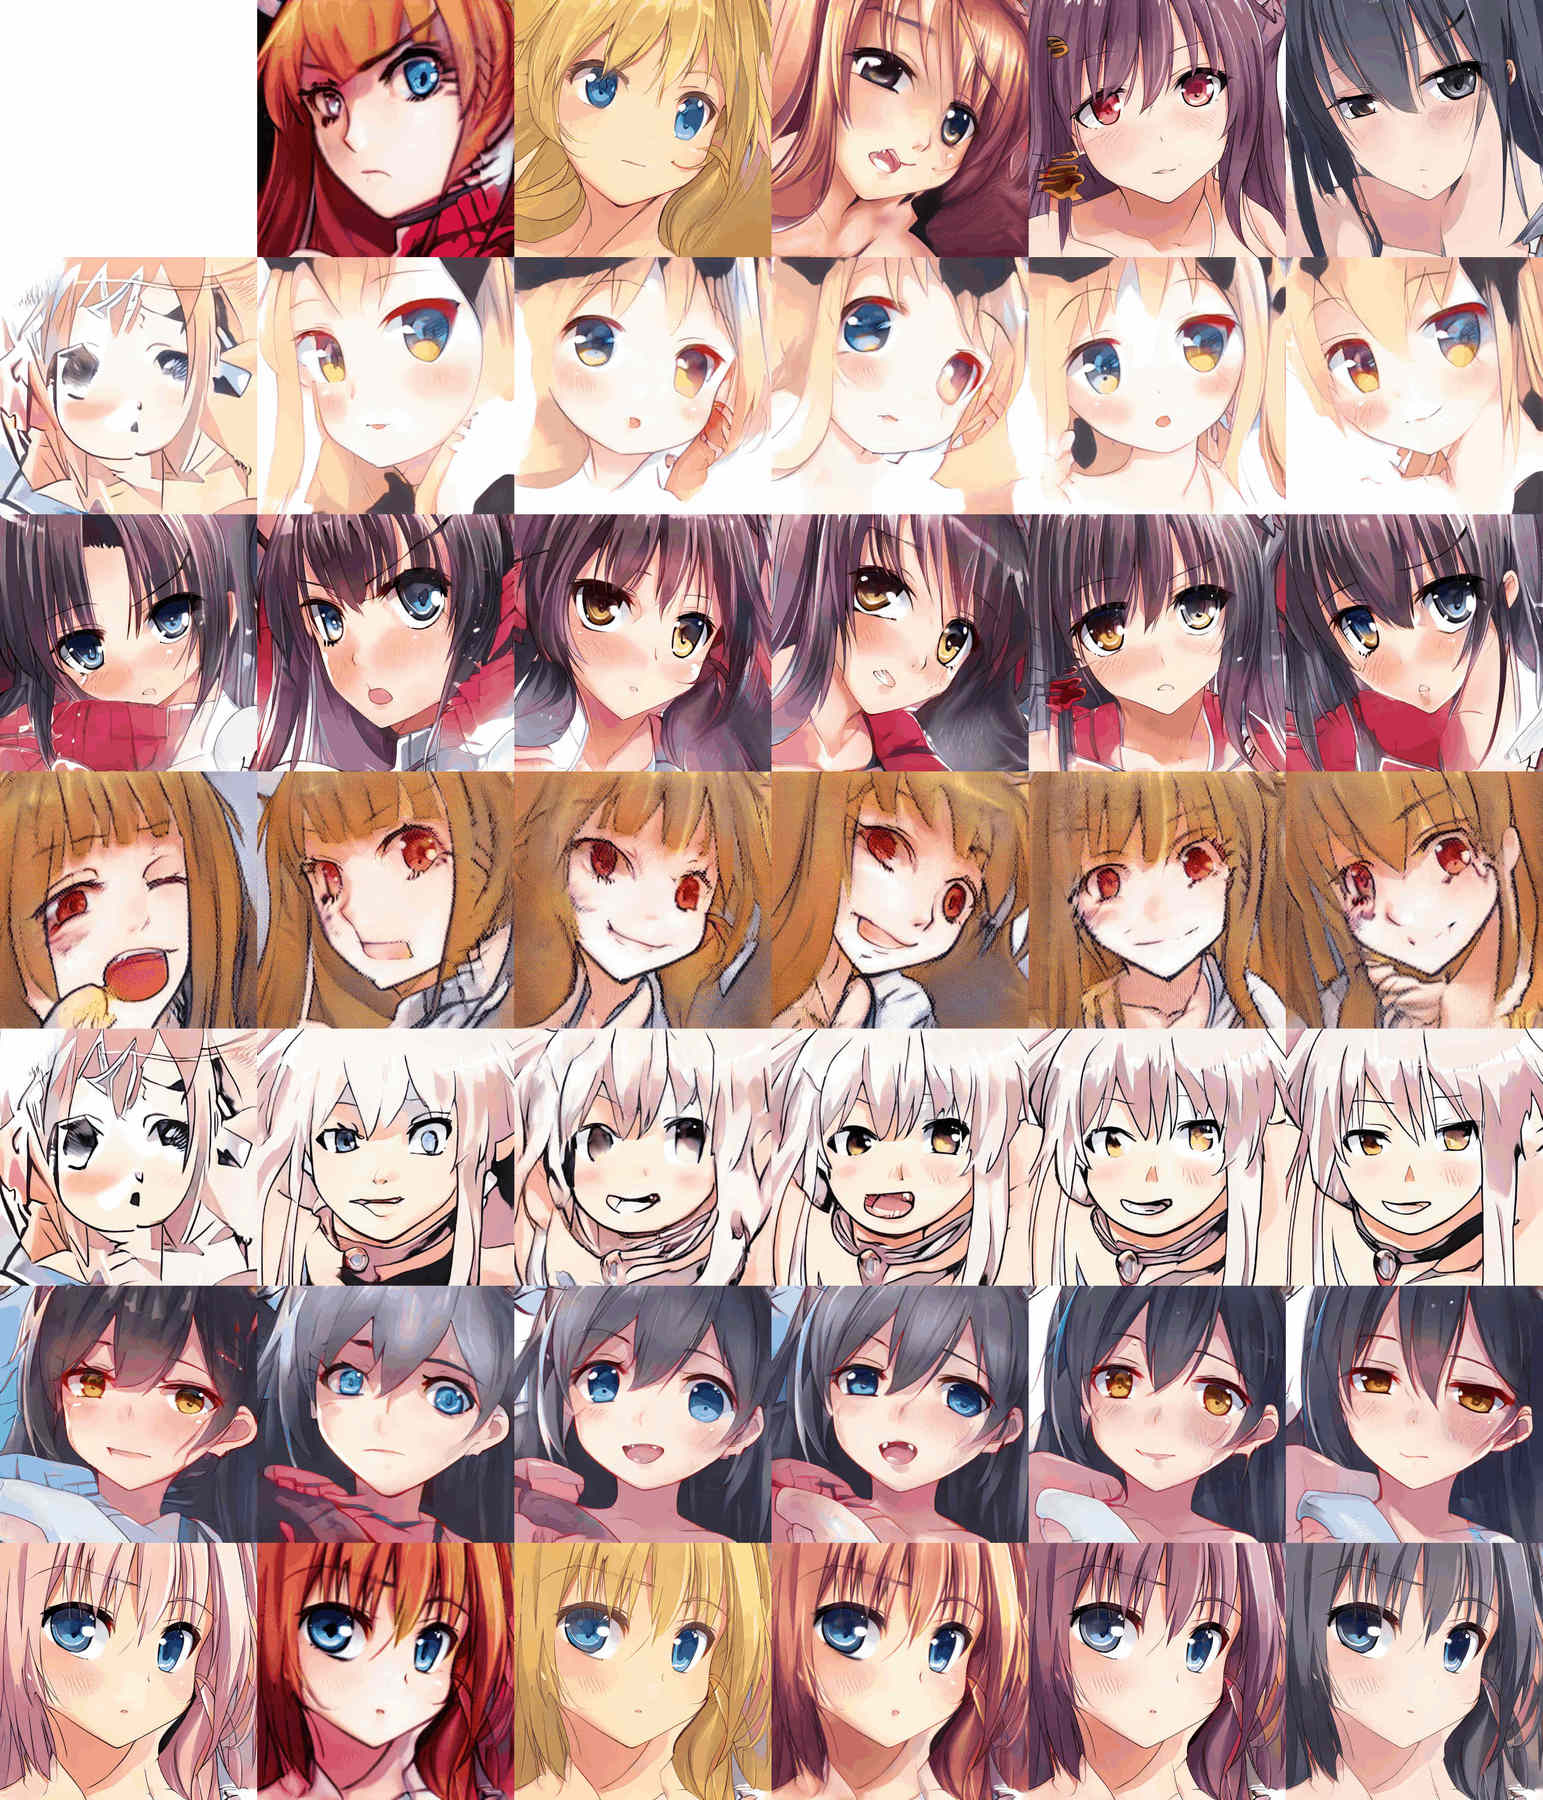
目标是将此图

转换成
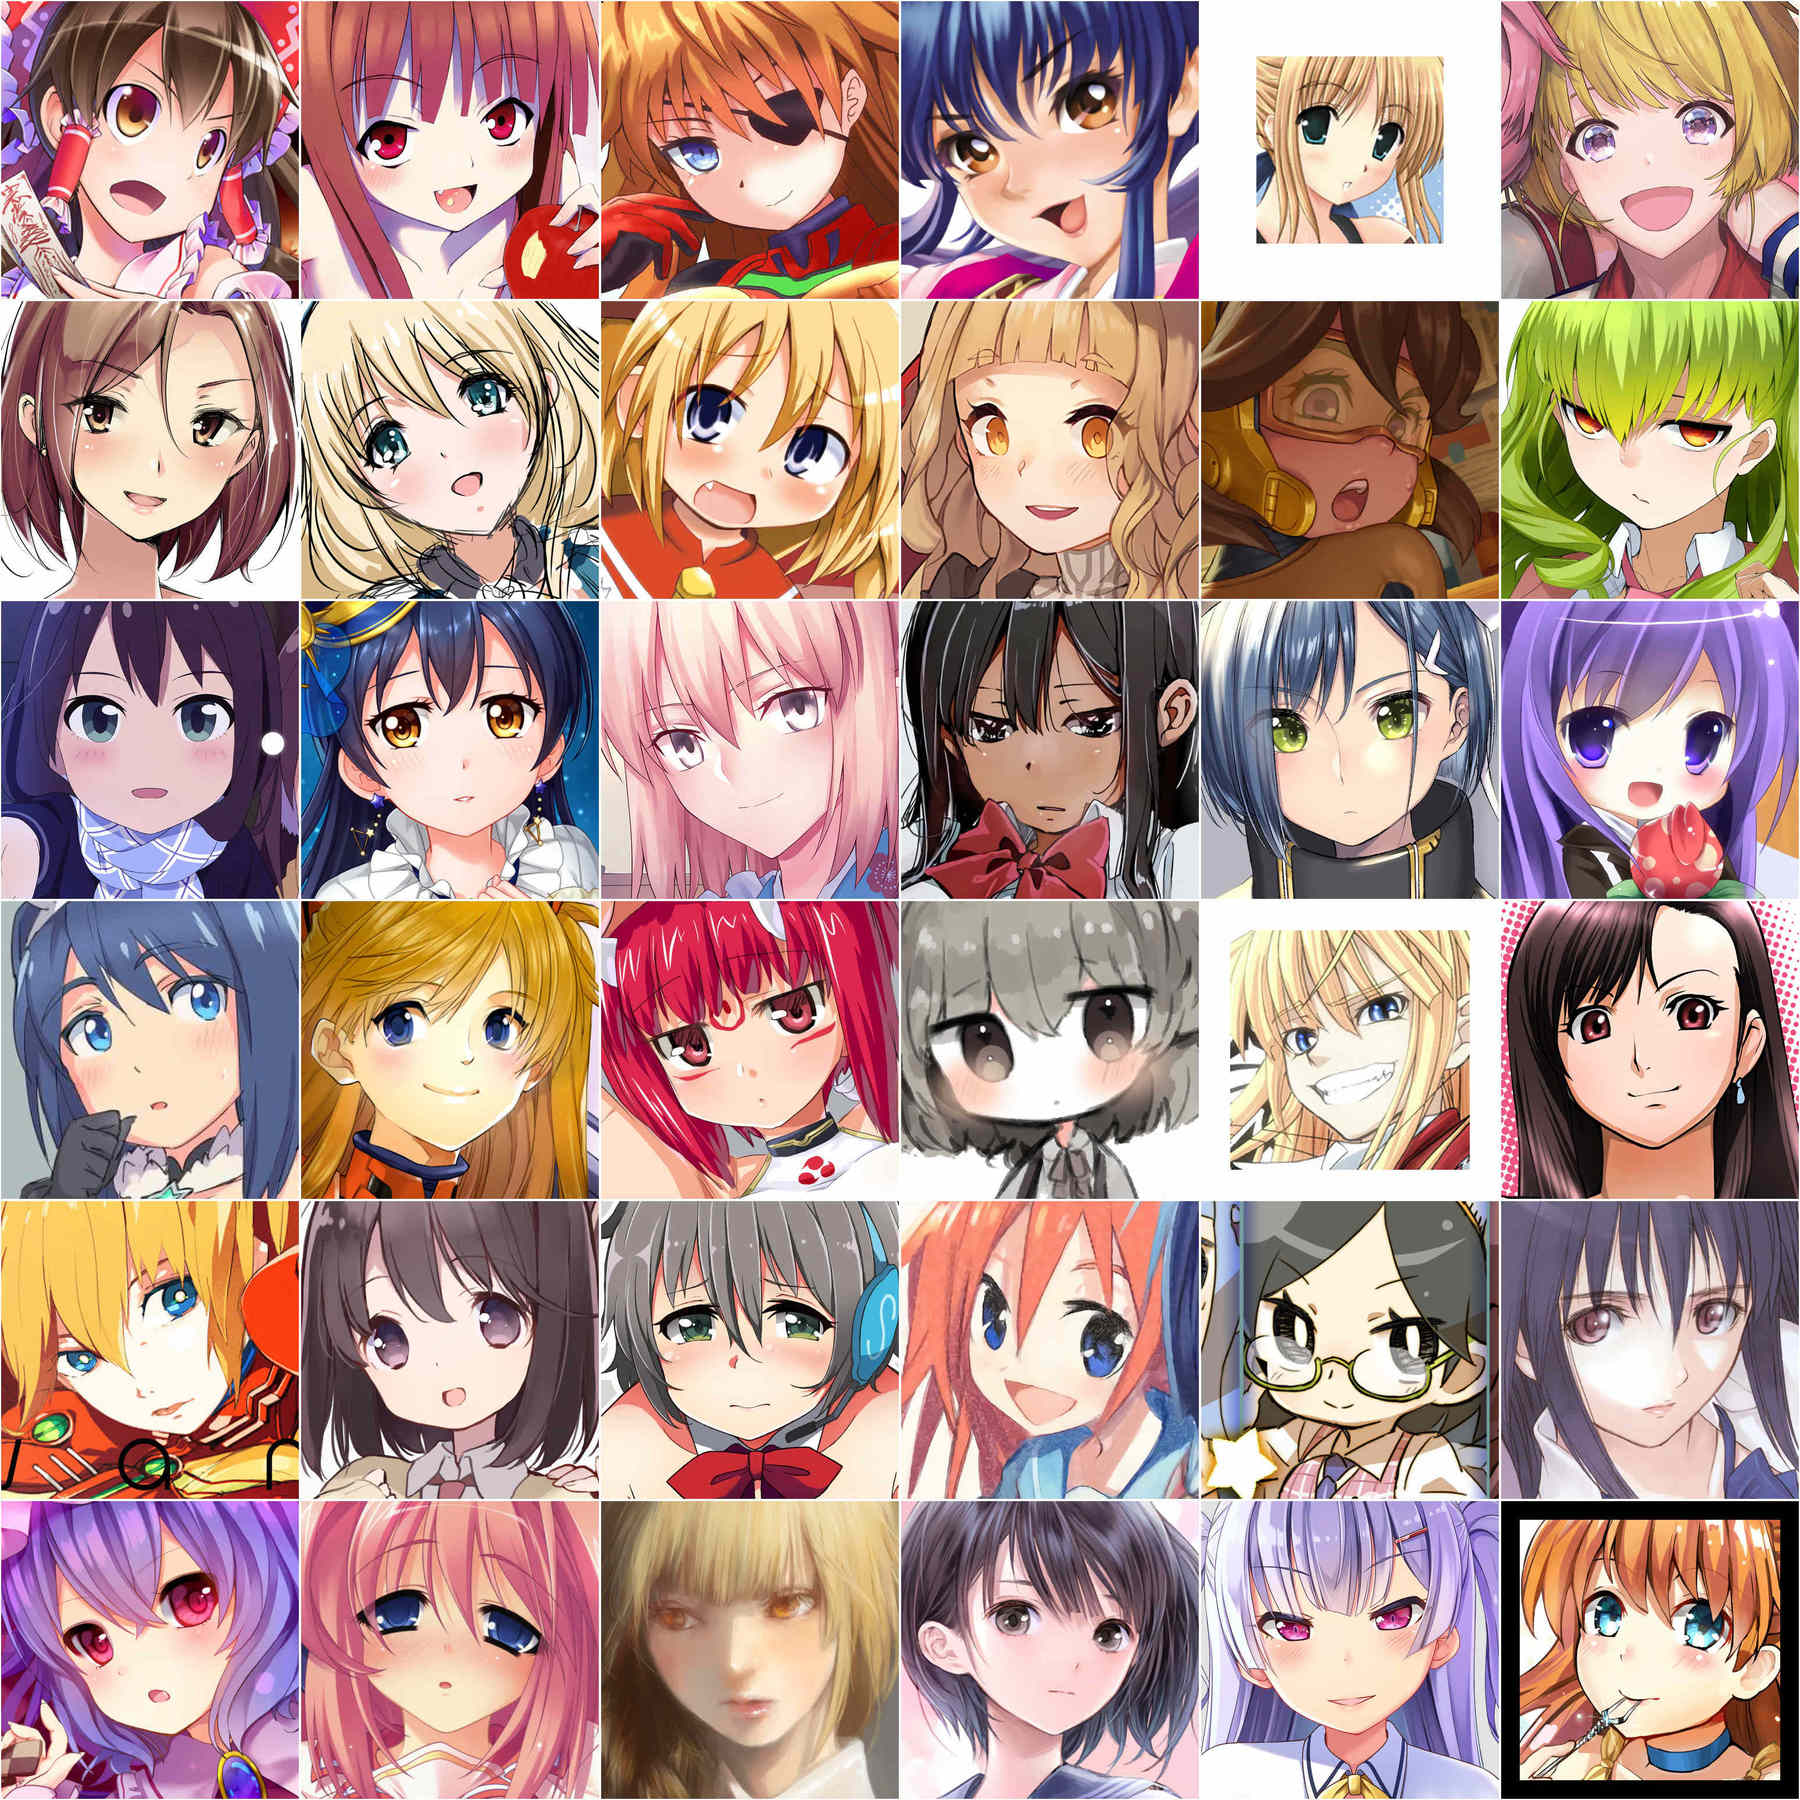
下面使用了一些脚本进行数据处理,可以使用danbooru-utility协助。

2.1 裁剪

原始的Danbooru2018可以使用磁链下载,提供了JSON的metadata,被压缩到metadata/2*和目录结构为{original,512px}/{0-999}/$ID.{png,jpg}。可以使用Danbooru2018512像素版本在整个SFW图像集上的训练,但是将所有图像缩放到512像素并非明智之举,因为会丢失大量面部信息,而保留高质量面部图像是个挑战。可以从512px/目录下的文件名中直接抽取SFW IDs,或者从metadata中抽取idrating字段并存入某个文件。

1
2
3
4
5
6
7
8
9
10
find ./512px/ -type f | sed -e 's/.*\/\([[:digit:]]*\)\.jpg/\1/'
# 967769
# 1853769
# 2729769
# 704769
# 1799769
# ...
tar xf metadata.json.tar.xz
cat metadata/* | jq '[.id, .rating]' -c | fgrep '"s"' | cut -d '"' -f 2 # "
# ...

可以安装和使用lbpcascade_animeface以及opencv,使用简单的一个脚本lbpcascade_animeface issue来裁剪图像。在Danbooru图像上表现惊人,大概有90%的高质量面部图像,5%低质量的,以及5%的错误图像(没有脸部)。也可以通过给脚本更多的限制,比如要求$256\times 256px$区域,可以消除大部分低质量的面部和错误。以下是crop.py

1
2
3
4
5
6
7
8
9
10
11
12
13
14
15
16
17
18
19
20
21
22
23
24
25
26
27
28
29
30
31
32
33
34
import cv2
import sys
import os.path

def detect(cascade_file, filename, outputname):
if not os.path.isfile(cascade_file):
raise RuntimeError("%s: not found" % cascade_file)

cascade = cv2.CascadeClassifier(cascade_file)
image = cv2.imread(filename)
gray = cv2.cvtColor(image, cv2.COLOR_BGR2GRAY)
gray = cv2.equalizeHist(gray)

## Suggested modification: increase minSize to '(250,250)' px,
## increasing proportion of high-quality faces & reducing
## false positives. Faces which are only 50x50px are useless
## and often not faces at all.

faces = cascade.detectMultiScale(gray,
# detector options
scaleFactor = 1.1,
minNeighbors = 5,
minSize = (50, 50))
i=0
for (x, y, w, h) in faces:
cropped = image[y: y + h, x: x + w]
cv2.imwrite(outputname+str(i)+".png", cropped)
i=i+1

if len(sys.argv) != 4:
sys.stderr.write("usage: detect.py <animeface.xml file> <input> <output prefix>\n")
sys.exit(-1)

detect(sys.argv[1], sys.argv[2], sys.argv[3])

IDs可以和提供的lbpcascade_animeface脚本使用xargs结合起来,但是这样还是太慢,使用并行策略xargs --max-args=1 --max-procs=16或者参数parallel更有效。lbpcascade_animeface脚本似乎使用了所有的GPU显存,但是没有可见的提升,我发现可以通过设置CUDA_VISIBLE_DEVICES=""来禁用GPU(此步骤还是使用多核CPU更有效)。

一切就绪之后,可以按照如下方式在整个Danbooru2018数据子集上使用并行的面部图像切割

1
2
3
4
5
6
7
8
9
10
11
cropFaces() {
BUCKET=$(printf "%04d" $(( $@ % 1000 )) )
ID="$@"
CUDA_VISIBLE_DEVICES="" nice python ~/src/lbpcascade_animeface/examples/crop.py \
~/src/lbpcascade_animeface/lbpcascade_animeface.xml \
./original/$BUCKET/$ID.* "./faces/$ID"
}
export -f cropFaces

mkdir ./faces/
cat sfw-ids.txt | parallel --progress cropFaces

2.2 上采样和使用GAN的Discriminator进行数据清洗

在训练GAN一段时间之后,重新用Disciminator对真实的数据点进行排序。通常情况下,被Disciminator判定最低得分的图片通常也是质量较差的,可以移除,这样也有助于提升GAN。然后GAN可以在新的干净数据集上重新训练,得以提升GAN。

由于对图像排序是Disciminator默认会做的事,所有不需要额外的训练或算法。下面是一个简单的ranker.py脚本,载入StyleGAN的.pkl模型,然后运行图片名列表,并打印D得分

1
2
3
4
5
6
7
8
9
10
11
12
13
14
15
16
17
18
19
20
21
22
import os
import pickle
import numpy as np
import PIL.Image
import dnnlib
import dnnlib.tflib as tflib
import config
import sys

def main():
tflib.init_tf()
_G, D, _Gs = pickle.load(open(sys.argv[1], "rb"))
image_filenames = sys.argv[2:]

for i in range(0, len(image_filenames)):
img = np.asarray(PIL.Image.open(image_filenames[i]))
img = img.reshape(1, 3,512,512)
score = D.run(img, None)
print(image_filenames[i], score[0][0])

if __name__ == "__main__":
main()

使用示例如下

1
2
3
4
5
6
7
8
9
10
11
12
13
14
15
find /media/gwern/Data/danbooru2018/characters-1k-faces/ -type f | xargs -n 9000 --max-procs=1 \
python ranker.py results/02086-sgan-portraits-2gpu/network-snapshot-058662.pkl \
| tee portraitfaces-rank.txt
fgrep /media/gwern/ 2019-04-22-portraitfaces-rank.txt | \
sort --field-separator ' ' --key 2 --numeric-sort | head -100
# .../megurine.luka/7853120.jpg -708.6835
# .../remilia.scarlet/26352470.jpg -707.39856
# .../z1.leberecht.maass..kantai.collection./26703440.jpg -702.76904
# .../suzukaze.aoba/27957490.jpg -700.5606
# .../jack.the.ripper..fate.apocrypha./31991880.jpg -700.0554
# .../senjougahara.hitagi/4947410.jpg -699.0976
# .../ayase.eli/28374650.jpg -698.7358
# .../ayase.eli/16185520.jpg -696.97845
# .../illustrious..azur.lane./31053930.jpg -696.8634
# ...

你可以选择删除一定数量,或者最靠近末尾的TOP N%的图片。同时也应该检查最靠前的TOP的图像,有些十分异常的也需要删除。可以使用ranker.py提高生成的样本质量,简单示例。

2.3 质量检测和数据增强

我们可以对图像质量进行人工校验,逐个浏览成百上千的图片,使用findimagedupes -t 99%来寻找近似相近的面部。在Danbooru2018中,可以有600-700000张脸,这已足够训练StyleGAN并且最终数据集有点大,会增加19倍。

但是如果我们需要在单一特征的小数据集上做,数据增强就比较有必要了。不需要做上下/左右翻转了,StyleGAN内部有做。我们可以做的是,颜色变换,锐化,模糊,增加/减小对比度,裁剪等操作。

2.4 上采样和转换

将图像转换成JPG可以大概节省33%的存储空间。但是切记,StyleGAN模型只接收在与其训练时所使用的相同的图片格式,像FFHQ数据集所使用的是PNG.

鉴于dataset_tool.py脚本在转换图片到tfrecords时太诡异,最好是打印每个处理完的图片,一旦程序崩溃,可以排错。对dataset_tool.py的简单修改如下:

1
2
3
4
5
6
7
with TFRecordExporter(tfrecord_dir, len(image_filenames)) as tfr:
order = tfr.choose_shuffled_order() if shuffle else np.arange(len(image_filenames))
for idx in range(order.size):
print(image_filenames[order[idx]])
img = np.asarray(PIL.Image.open(image_filenames[order[idx]]))
if channels == 1:
img = img[np.newaxis, :, :] # HW => CHW

3 训练模型

参数配置

  1. train/training_loop.py:关键配置参数是training_loop.py的112行起。关键参数
  • G_smoothing_kimgD_repeats(影响学习的动态learning dynamics),
  • network_snapshot_ticks(多久存储一次中间模型)
  • resume_run_id: 设置为latest
  • resume_kimg.注意,它决定了模型训练的阶段,如果设置为0,模型会从头开始训练而无视之前的训练结果,即从最低分辨率开始。如果要做迁移学习,需要将其设置为一个足够高的数目,如10000,这样一来,模型就可以在最高分辨率,如$512\times 512$的阶段开始训练。
  • 建议将minibatch_repeats = 5改为minibatch_repeats = 1。此处我怀疑ProGAN/StyleGAN中的梯度累加的实现,这样会使得训练过程更加稳定、更快。
  • 注意,一些参数如学习率,会在train.py中被覆盖。最好是在覆盖的地方修改,
  1. train.py (以前是config.py):设置GPU的数目,图像分辨率,数据集,学习率,水平翻转/镜像数据增强,以及minibatch-size。(此文件包含了ProGAN的一些配置参数,你并不是突然开启了ProGAN)。学习率和minbatch通常不用管(除非你想在训练的末尾阶段降低学习率以提升算法能力)。图像分辨率/dataset/mirroring需要设置,如
1
desc += '-faces'; dataset = EasyDict(tfrecord_dir='faces', resolution=512); train.mirror_augment = True

此处设置了$512\times 512$的脸部数据集,我们前面创建的datasets/faces,启用mirror。假如没有8个GPU,必须修改-preset以匹配你的GPU数量,StyleGAN不会自动修改的。对于两块 2080ti,设置如下

1
2
3
desc += '-preset-v2-2gpus'; submit_config.num_gpus = 2; sched.minibatch_base = 8; sched.minibatch_dict = \
{4: 256, 8: 256, 16: 128, 32: 64, 64: 32, 128: 16, 256: 8}; sched.G_lrate_dict = {512: 0.0015, 1024: 0.002}; \
sched.D_lrate_dict = EasyDict(sched.G_lrate_dict); train.total_kimg = 99000

最后的结果会被保存到results/00001-sgan-faces-2gpu00001代表递增ID,sgan因为使用的是StyleGAN而非ProGAN,-faces是训练的数据集,-2gpu即我们使用的多GPU)。

4 运行过程

相比于训练其他GAN,StyleGAN更稳定更好训练,但是也容易出问题。

4.1 Crashproofing

StyleGAN容易在混合GPU(1080ti+Titan V)上训练时崩溃,低版本的Tensorflow上也是,可以升级解决。如果崩溃了,代码无法自动继续上一次的训练迭代次数,需要手工在training_loop.py中修改resume_run_id为最后崩溃时的迭代次数。建议将此处的resume_run_id参数修改为resume_run_id=latest

4.2 调节学习率

学习率这个是最重要的超参数之一:在小batch size数据过大的更新会极大破坏GAN的稳定性和最终结果。论文在FFHQ数据集上,8个GPU,32的batch size时使用的学习率是0.003,但是在我们的动画数据集上,batch size=8更低的学习率效果更好。学习率与batch size非常相关,越难的数据集学习率应该更小。

4.3 G/D的均衡

在后续的训练中,如果G没有产生很好的进步,没有朝着0.5的损失前进(而对应的D的损失朝着0.5大幅度缩减),并且在-1.0左右卡住或者其他的问题。此时,有必要调节G/D的均衡了。有几种方法可以完成此事,最简单的办法是在train.py中调节sched.G_lrate_dict的学习率参数。

需要时刻关注G/D的损失,以及面部图像的perceptual质量,同时需要基于面部图像以及G/D的损失是否在爆炸或者严重不均衡而减小G和D的学习率(或者只减小D的学习率)。我们设想的是G/D的损失在一个确定的绝对损失值,同时质量有肉眼可见的提高,减小D的学习率有助于保持与G的均衡。当然如果超出你的耐心,或者时间不够,可以考虑同时减小D/G的学习率达到一个局部最优。

默认的0.003的学习率可能在达到高质量的面部和肖像图像时变得太高,可以将其减小三分之一或十分之一。如果任然不能收敛,D可能太强,可以单独的将其能力降低。由于训练的随机性和损失的相对性,可能需要在修改参数之后的很多小时或者很多天之后才能看到效果。

4.4 跳过FID指标

一些指标用来计算日志。FID指标是ImageNet CNN的计算指标,可能在ImageNet中重要的特性在你的特定领域中其实是不相关的,并且一个大的FID如100是可以考虑的,FIDs为20或者增大都不太是个问题或者是个有用的指导,还不如直接看生成的样本呢。建议直接禁用FIDs指标(训练阶段并没有,所以直接禁用是安全的)。

可以直接通过注释metrics.run的调用来禁用

1
2
3
4
5
@@ -261,7 +265,7 @@ def training_loop()
if cur_tick % network_snapshot_ticks == 0 or done or cur_tick == 1:
pkl = os.path.join(submit_config.run_dir, 'network-snapshot-%06d.pkl' % (cur_nimg // 1000))
misc.save_pkl((G, D, Gs), pkl)
# metrics.run(pkl, run_dir=submit_config.run_dir, num_gpus=submit_config.num_gpus, tf_config=tf_config)

4.5 BLOB(斑块)和CRACK(裂缝)缺陷

训练过程中,blobs(可以理解为斑块)时不时出现。这些blobs甚至出现在训练的后续阶段,在一些已经生成的高质量图像上,并且这些blob可能是与StyleGAN独有的(至少没有在其他GAN上出现过这个blob)。这些blob如此大并且刺眼。这些斑块出现的原因未知,据推测可能是$3\times 3$的卷积层导致的;可能使用额外的$1\times 1$卷积或者自相关层可以消除这个问题。

如果斑块出现得太频繁或者想完全消除,降低学习率达到一个局部最优可能有用。

训练动漫人物面部时,我看到了其他的缺陷,看起来像裂缝或者波浪或者皮肤上的皱纹,它们会一直伴随着训练直至最终。在小数据集做迁移学习时 会经常出现。与blob斑块相反,我目前怀疑裂缝的出现是过拟合的标识,而非StyleGAN的一种特质。当G开始记住最终的线条或像素上的精细细节的噪音时,目前的仅有的解决方案是要么停止训练要么增加数据。

4.6 梯度累加

ProGAN/StyleGAN的代码宣称支持梯度累加,这是一种形似大的minibatch训练(batch_size=2048)的技巧,它通过不向后传播每个minibatch,但是累加多个minibatch,然后一次执行的方式实现。这是一种保持训练稳定的有效策略,增加minibatch尺寸有助于提高生成图像的质量。

但是ProGAN/StyleGAN的梯度累加的实现在Tensorflow或Pytorch中并没有类似的,以我个人的经验来看,最大可以加到4096,但是并没有看到什么区别,所以我怀疑这个实现是错误的。

下面是我训练的动漫人脸的模型,训练了21980步,在2100万张图像上,38个GPU一天,尽管还没完全收敛,但是效果很好。
训练效果

5 采样

5.1 PSI/Truncation Trick

截断技巧$\phi$ 是所有StyleGAN生成器的最重要的超参数。它用在样本生成阶段,而非训练时。思路是,编辑latent 向量z,一个服从N(0,1)分布的向量,会自动删除所有大于特定值,比如0.5或1.0的变量。这看起来会避免极端的latent值,或者删除那些与G组合不太好的latent值。G不会生成与每个latent值在+1.5SD的点生成很多数据点。
代价便是这些依然是全部latent变量的何方区域,并且可以在训练期间被用来覆盖部分数据分布。因而,尽管latent变量接近0的均值才是最准确的模型,它们仅仅是全部可能的产生图像的数据空间上的一小部分。因而,我们可以从全部的无限制的正态分布$N(0,1)$上生成latent变量,也既可以截断如$+1SD或者+0.7SD$。

$\omega =0$时,多样性为0,并且所有生成的脸都是同一个角度(棕色眼睛,棕色头发的校园女孩,毫无例外的),在$\omega \pm 0.5$时有更多区间的脸,在$\omega \pm 1.2$时会看到大量的多样性的脸/发型/一致性,但是也能看到大量的伪造像/失真像.参数$\omega$会极大地影响原始的输出。$\omega =1.2$时,得到的是异常原始但是极度真实或者失真。$\omega =0.5$时,具备一致连贯性,但是也很无聊。我的大部分采样,设置$\omega =0.7$可以得到最好的均衡。(就个人来说$\omega =1.2$时,采样最有趣)

5.2 随机采样

StyleGAN有个简单的脚本prtrained_example.py下载和生成单张人脸,为了复现效果,它在模型中指定了RNG随机数的种子,这样它会生成特定的人脸。然而,可以轻易地引入使用本地模型并生成,比如说1000张图像,指定参数$\omega =0.6$(此时会产生高质量图像,但是图像多样性较差)并保存结果到results/example-{0-999}.png

1
2
3
4
5
6
7
8
9
10
11
12
13
14
15
16
17
18
19
20
21
22
23
24
25

import os
import pickle
import numpy as np
import PIL.Image
import dnnlib
import dnnlib.tflib as tflib
import config

def main():
tflib.init_tf()
_G, _D, Gs = pickle.load(open("results/02051-sgan-faces-2gpu/network-snapshot-021980.pkl", "rb"))
Gs.print_layers()

for i in range(0,1000):
rnd = np.random.RandomState(None)
latents = rnd.randn(1, Gs.input_shape[1])
fmt = dict(func=tflib.convert_images_to_uint8, nchw_to_nhwc=True)
images = Gs.run(latents, None, truncation_psi=0.6, randomize_noise=True, output_transform=fmt)
os.makedirs(config.result_dir, exist_ok=True)
png_filename = os.path.join(config.result_dir, 'example-'+str(i)+'.png')
PIL.Image.fromarray(images[0], 'RGB').save(png_filename)

if __name__ == "__main__":
main()

5.3 Karras et al 2018图像

此图像展示了使用1024像素的FFHQ 脸部模型(以及其他),使用脚本generate_figure.py生成随机样本以及style noise的方面影响。此脚本需要大量修改来运行我的512像素的动漫人像。

  • 代码使用$\omega=1.0$截断,但是面部在$\omega=0.7$的时候看起来更好(好几个脚本都是用了truncation_psi=,但是严格来说,图3的draw_style_mixiing_figure将参数$\omega$隐藏在全局变量sythesis_kwargs中)

  • 载入模型需要被换到动漫面部模型

  • 需要将维度$1024\rightarrow 512$,其他被硬编码(hardcoded)的区间(ranges)必须被减小到521像素的图像。

  • 截断技巧图8并没有足够的足够的面部来展示latent空间的用处,所以它需要被扩充来展示随机种子和面部图像,以及更多的$\omega$值。

  • bedroom/car/cat样本应该被禁用

代码改动如下

1
2
3
4
5
6
7
8
9
10
11
12
13
14
15
16
17
18
19
20
21
22
23
24
25
26
27
28
29
30
31
32
33
34
35
36
37
38
39
40
41
42
43
44
45
46
47
48
49
50
51
52
53
54
 url_cars = 'https://drive.google.com/uc?id=1MJ6iCfNtMIRicihwRorsM3b7mmtmK9c3' # karras2019stylegan-cars-512x384.pkl
url_cats = 'https://drive.google.com/uc?id=1MQywl0FNt6lHu8E_EUqnRbviagS7fbiJ' # karras2019stylegan-cats-256x256.pkl

-synthesis_kwargs = dict(output_transform=dict(func=tflib.convert_images_to_uint8, nchw_to_nhwc=True), minibatch_size=8)
+synthesis_kwargs = dict(output_transform=dict(func=tflib.convert_images_to_uint8, nchw_to_nhwc=True), minibatch_size=8, truncation_psi=0.7)

_Gs_cache = dict()

def load_Gs(url):
- if url not in _Gs_cache:
- with dnnlib.util.open_url(url, cache_dir=config.cache_dir) as f:
- _G, _D, Gs = pickle.load(f)
- _Gs_cache[url] = Gs
- return _Gs_cache[url]
+ _G, _D, Gs = pickle.load(open("results/02051-sgan-faces-2gpu/network-snapshot-021980.pkl", "rb"))
+ return Gs

#----------------------------------------------------------------------------
# Figures 2, 3, 10, 11, 12: Multi-resolution grid of uncurated result images.
@@ -85,7 +82,7 @@ def draw_noise_detail_figure(png, Gs, w, h, num_samples, seeds):
canvas = PIL.Image.new('RGB', (w * 3, h * len(seeds)), 'white')
for row, seed in enumerate(seeds):
latents = np.stack([np.random.RandomState(seed).randn(Gs.input_shape[1])] * num_samples)
- images = Gs.run(latents, None, truncation_psi=1, **synthesis_kwargs)
+ images = Gs.run(latents, None, **synthesis_kwargs)
canvas.paste(PIL.Image.fromarray(images[0], 'RGB'), (0, row * h))
for i in range(4):
crop = PIL.Image.fromarray(images[i + 1], 'RGB')
@@ -109,7 +106,7 @@ def draw_noise_components_figure(png, Gs, w, h, seeds, noise_ranges, flips):
all_images = []
for noise_range in noise_ranges:
tflib.set_vars({var: val * (1 if i in noise_range else 0) for i, (var, val) in enumerate(noise_pairs)})
- range_images = Gsc.run(latents, None, truncation_psi=1, randomize_noise=False, **synthesis_kwargs)
+ range_images = Gsc.run(latents, None, randomize_noise=False, **synthesis_kwargs)
range_images[flips, :, :] = range_images[flips, :, ::-1]
all_images.append(list(range_images))

@@ -144,14 +141,11 @@ def draw_truncation_trick_figure(png, Gs, w, h, seeds, psis):
def main():
tflib.init_tf()
os.makedirs(config.result_dir, exist_ok=True)
- draw_uncurated_result_figure(os.path.join(config.result_dir, 'figure02-uncurated-ffhq.png'), load_Gs(url_ffhq), cx=0, cy=0, cw=1024, ch=1024, rows=3, lods=[0,1,2,2,3,3], seed=5)
- draw_style_mixing_figure(os.path.join(config.result_dir, 'figure03-style-mixing.png'), load_Gs(url_ffhq), w=1024, h=1024, src_seeds=[639,701,687,615,2268], dst_seeds=[888,829,1898,1733,1614,845], style_ranges=[range(0,4)]*3+[range(4,8)]*2+[range(8,18)])
- draw_noise_detail_figure(os.path.join(config.result_dir, 'figure04-noise-detail.png'), load_Gs(url_ffhq), w=1024, h=1024, num_samples=100, seeds=[1157,1012])
- draw_noise_components_figure(os.path.join(config.result_dir, 'figure05-noise-components.png'), load_Gs(url_ffhq), w=1024, h=1024, seeds=[1967,1555], noise_ranges=[range(0, 18), range(0, 0), range(8, 18), range(0, 8)], flips=[1])
- draw_truncation_trick_figure(os.path.join(config.result_dir, 'figure08-truncation-trick.png'), load_Gs(url_ffhq), w=1024, h=1024, seeds=[91,388], psis=[1, 0.7, 0.5, 0, -0.5, -1])
- draw_uncurated_result_figure(os.path.join(config.result_dir, 'figure10-uncurated-bedrooms.png'), load_Gs(url_bedrooms), cx=0, cy=0, cw=256, ch=256, rows=5, lods=[0,0,1,1,2,2,2], seed=0)
- draw_uncurated_result_figure(os.path.join(config.result_dir, 'figure11-uncurated-cars.png'), load_Gs(url_cars), cx=0, cy=64, cw=512, ch=384, rows=4, lods=[0,1,2,2,3,3], seed=2)
- draw_uncurated_result_figure(os.path.join(config.result_dir, 'figure12-uncurated-cats.png'), load_Gs(url_cats), cx=0, cy=0, cw=256, ch=256, rows=5, lods=[0,0,1,1,2,2,2], seed=1)
+ draw_uncurated_result_figure(os.path.join(config.result_dir, 'figure02-uncurated-ffhq.png'), load_Gs(url_ffhq), cx=0, cy=0, cw=512, ch=512, rows=3, lods=[0,1,2,2,3,3], seed=5)
+ draw_style_mixing_figure(os.path.join(config.result_dir, 'figure03-style-mixing.png'), load_Gs(url_ffhq), w=512, h=512, src_seeds=[639,701,687,615,2268], dst_seeds=[888,829,1898,1733,1614,845], style_ranges=[range(0,4)]*3+[range(4,8)]*2+[range(8,16)])
+ draw_noise_detail_figure(os.path.join(config.result_dir, 'figure04-noise-detail.png'), load_Gs(url_ffhq), w=512, h=512, num_samples=100, seeds=[1157,1012])
+ draw_noise_components_figure(os.path.join(config.result_dir, 'figure05-noise-components.png'), load_Gs(url_ffhq), w=512, h=512, seeds=[1967,1555], noise_ranges=[range(0, 18), range(0, 0), range(8, 18), range(0, 8)], flips=[1])
+ draw_truncation_trick_figure(os.path.join(config.result_dir, 'figure08-truncation-trick.png'), load_Gs(url_ffhq), w=512, h=512, seeds=[91,388, 389, 390, 391, 392, 393, 394, 395, 396], psis=[1, 0.7, 0.5, 0.25, 0, -0.25, -0.5, -1])

修改完之后,可以得到一些有趣的动漫人脸样本。

上图是随机样本

上图是使用风格混合样本。展示了编辑和差值(第一行是风格,左边列代表了要转变风格的图像)
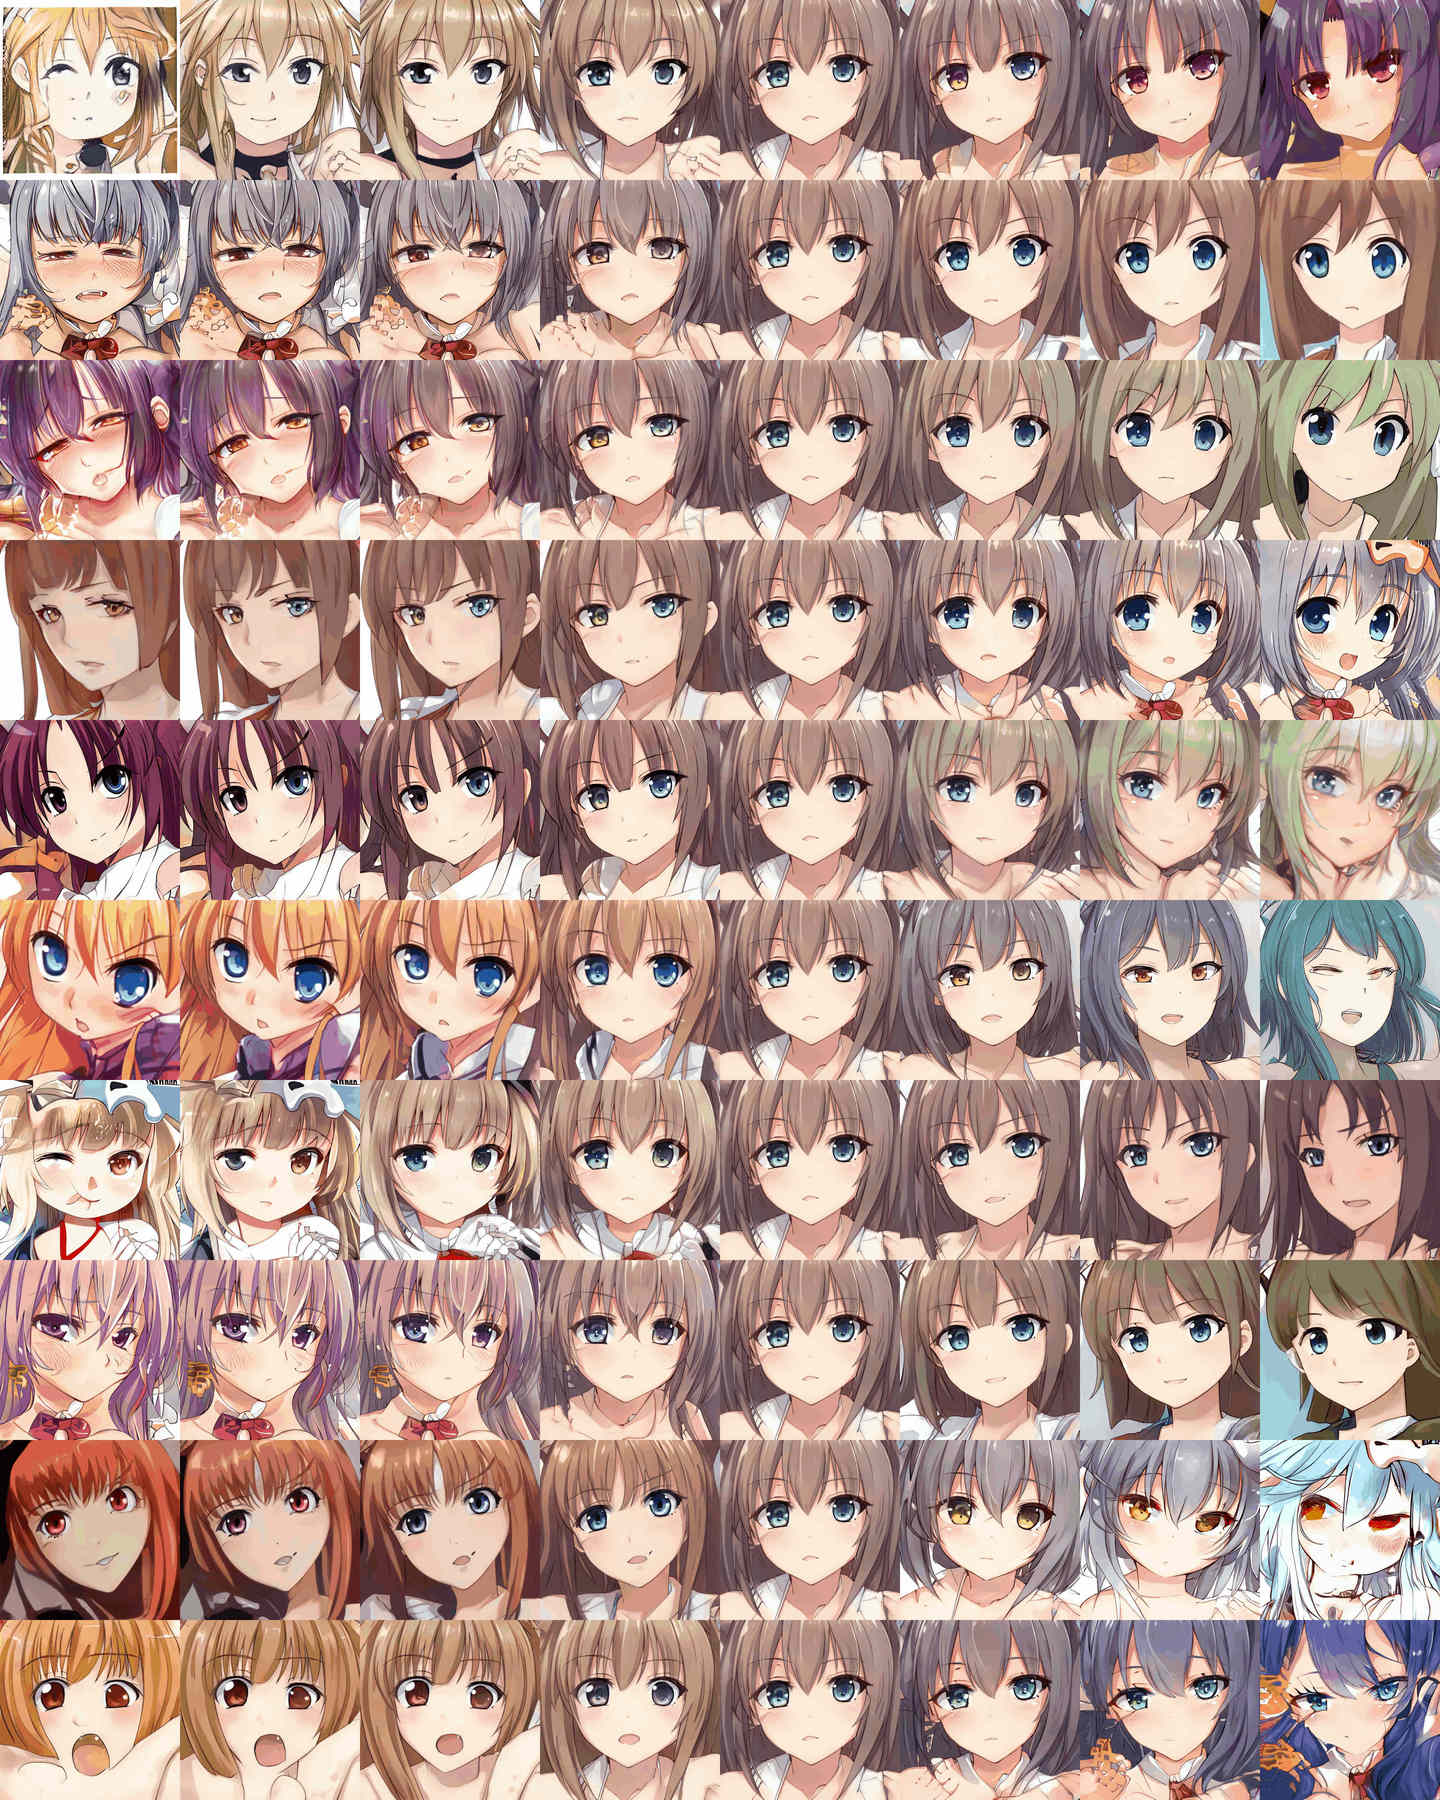
上图展示了使用阶段技巧的。10张随机面部,$\omega$区间为$[1,0.7,0.5,0.25,-0.25,-0.5,-1]$展示了在多样性/质量/平均脸之间的妥协。

6 视频

6.1 训练剪辑

最简单的样本时在训练过程中产生的中间结果,训练过程中由于分辨率递增和更精细细节的生成,样本尺寸也会增加,最后视频可能会很大(动漫人脸大概会有14MB),所以有必要做一些压缩。使用工具pngnq+advpng或者将它们转成JPG格式(图像质量会降低),在PNG图像上使用FFmpeg将训练过程中的图像转成视频剪辑。

1
2
3
4
5
6
7
8
9
cat $(ls ./results/*faces*/fakes*.png | sort --numeric-sort) | ffmpeg -framerate 10 \ # show 10 inputs per second
-i - # stdin
-r 25 # output frame-rate; frames will be duplicated to pad out to 25FPS
-c:v libx264 # x264 for compatibility
-pix_fmt yuv420p # force ffmpeg to use a standard colorspace - otherwise PNG colorspace is kept, breaking browsers (!)
-crf 33 # adequate high quality
-vf "scale=iw/2:ih/2" \ # shrink the image by 2x, the full detail is not necessary & saves space
-preset veryslow -tune animation \ # aim for smallest binary possible with animation-tuned settings
./stylegan-facestraining.mp4

6.2 差值

原始的ProGAN仓库代码提供了配置文件来生成差值视频的,但是在StyleGAN中被移除了,Cyril Diagne的替代实现(已经没法打开了)提供了三种视频

  1. random_grid_404.mp4:标准差值视频,在latent空间中简单的随机游走。修改这些所有变量变量并做成动画,默认会作出$2\times 2$一共4个视频。几个差值视频可以从这里看到

  2. interpolate.mp4:粗糙的风格混合视频。生成单一的面部图,一个二流的差值视频,在生成之前在latent空间中随机游走,每个随机步,其粗糙(coarse)/高级(high-level)风格噪音都会从随机步复制到面部风格噪音数据中。对于面部来说,面部会被各式各样地修改,比如方向、面部表情,但是基本面部可以被识别。

下面是video.py代码

1
2
3
4
5
6
7
8
9
10
11
12
13
14
15
16
17
18
19
20
21
22
23
24
25
26
27
28
29
30
31
32
33
34
35
36
37
38
39
40
41
42
43
44
45
46
47
48
49
50
51
52
53
54
55
56
57
58
59
60
61
62
63
64
65
66
67
68
69
70
71
72
73
74
75
76
77
78
79
80
81
82
83
84
85
86
87
88
89
90
91
92
93
94
95
96
97
98
99
100
101
102
103
104
105
106
107
108
109
110
111
112
113
114
115
116
117
118
119
120
121
122
123
124
125
126
127
128
129
130
131
132
133
134
135
136
137
138
139
140
141
142
143
144
145
146
147
148
149
150
151
152
153
154
155
156
157
158
159
160
161
162
163
164
165
166
167
168
169
170
171
172
173
174
175
176
177
178
179
180
181
182
183
184
185
186
187
188
189
190
191
192
193
194
195
import os
import pickle
import numpy as np
import PIL.Image
import dnnlib
import dnnlib.tflib as tflib
import config
import scipy

def main():

tflib.init_tf()

# Load pre-trained network.
# url = 'https://drive.google.com/uc?id=1MEGjdvVpUsu1jB4zrXZN7Y4kBBOzizDQ'
# with dnnlib.util.open_url(url, cache_dir=config.cache_dir) as f:
## NOTE: insert model here:
_G, _D, Gs = pickle.load(open("results/02047-sgan-faces-2gpu/network-snapshot-013221.pkl", "rb"))
# _G = Instantaneous snapshot of the generator. Mainly useful for resuming a previous training run.
# _D = Instantaneous snapshot of the discriminator. Mainly useful for resuming a previous training run.
# Gs = Long-term average of the generator. Yields higher-quality results than the instantaneous snapshot.

grid_size = [2,2]
image_shrink = 1
image_zoom = 1
duration_sec = 60.0
smoothing_sec = 1.0
mp4_fps = 20
mp4_codec = 'libx264'
mp4_bitrate = '5M'
random_seed = 404
mp4_file = 'results/random_grid_%s.mp4' % random_seed
minibatch_size = 8

num_frames = int(np.rint(duration_sec * mp4_fps))
random_state = np.random.RandomState(random_seed)

# Generate latent vectors
shape = [num_frames, np.prod(grid_size)] + Gs.input_shape[1:] # [frame, image, channel, component]
all_latents = random_state.randn(*shape).astype(np.float32)
import scipy
all_latents = scipy.ndimage.gaussian_filter(all_latents, [smoothing_sec * mp4_fps] + [0] * len(Gs.input_shape), mode='wrap')
all_latents /= np.sqrt(np.mean(np.square(all_latents)))


def create_image_grid(images, grid_size=None):
assert images.ndim == 3 or images.ndim == 4
num, img_h, img_w, channels = images.shape

if grid_size is not None:
grid_w, grid_h = tuple(grid_size)
else:
grid_w = max(int(np.ceil(np.sqrt(num))), 1)
grid_h = max((num - 1) // grid_w + 1, 1)

grid = np.zeros([grid_h * img_h, grid_w * img_w, channels], dtype=images.dtype)
for idx in range(num):
x = (idx % grid_w) * img_w
y = (idx // grid_w) * img_h
grid[y : y + img_h, x : x + img_w] = images[idx]
return grid

# Frame generation func for moviepy.
def make_frame(t):
frame_idx = int(np.clip(np.round(t * mp4_fps), 0, num_frames - 1))
latents = all_latents[frame_idx]
fmt = dict(func=tflib.convert_images_to_uint8, nchw_to_nhwc=True)
images = Gs.run(latents, None, truncation_psi=0.7,
randomize_noise=False, output_transform=fmt)

grid = create_image_grid(images, grid_size)
if image_zoom > 1:
grid = scipy.ndimage.zoom(grid, [image_zoom, image_zoom, 1], order=0)
if grid.shape[2] == 1:
grid = grid.repeat(3, 2) # grayscale => RGB
return grid

# Generate video.
import moviepy.editor
video_clip = moviepy.editor.VideoClip(make_frame, duration=duration_sec)
video_clip.write_videofile(mp4_file, fps=mp4_fps, codec=mp4_codec, bitrate=mp4_bitrate)

# import scipy
# coarse
duration_sec = 60.0
smoothing_sec = 1.0
mp4_fps = 20

num_frames = int(np.rint(duration_sec * mp4_fps))
random_seed = 500
random_state = np.random.RandomState(random_seed)


w = 512
h = 512
#src_seeds = [601]
dst_seeds = [700]
style_ranges = ([0] * 7 + [range(8,16)]) * len(dst_seeds)

fmt = dict(func=tflib.convert_images_to_uint8, nchw_to_nhwc=True)
synthesis_kwargs = dict(output_transform=fmt, truncation_psi=0.7, minibatch_size=8)

shape = [num_frames] + Gs.input_shape[1:] # [frame, image, channel, component]
src_latents = random_state.randn(*shape).astype(np.float32)
src_latents = scipy.ndimage.gaussian_filter(src_latents,
smoothing_sec * mp4_fps,
mode='wrap')
src_latents /= np.sqrt(np.mean(np.square(src_latents)))

dst_latents = np.stack(np.random.RandomState(seed).randn(Gs.input_shape[1]) for seed in dst_seeds)


src_dlatents = Gs.components.mapping.run(src_latents, None) # [seed, layer, component]
dst_dlatents = Gs.components.mapping.run(dst_latents, None) # [seed, layer, component]
src_images = Gs.components.synthesis.run(src_dlatents, randomize_noise=False, **synthesis_kwargs)
dst_images = Gs.components.synthesis.run(dst_dlatents, randomize_noise=False, **synthesis_kwargs)


canvas = PIL.Image.new('RGB', (w * (len(dst_seeds) + 1), h * 2), 'white')

for col, dst_image in enumerate(list(dst_images)):
canvas.paste(PIL.Image.fromarray(dst_image, 'RGB'), ((col + 1) * h, 0))

def make_frame(t):
frame_idx = int(np.clip(np.round(t * mp4_fps), 0, num_frames - 1))
src_image = src_images[frame_idx]
canvas.paste(PIL.Image.fromarray(src_image, 'RGB'), (0, h))

for col, dst_image in enumerate(list(dst_images)):
col_dlatents = np.stack([dst_dlatents[col]])
col_dlatents[:, style_ranges[col]] = src_dlatents[frame_idx, style_ranges[col]]
col_images = Gs.components.synthesis.run(col_dlatents, randomize_noise=False, **synthesis_kwargs)
for row, image in enumerate(list(col_images)):
canvas.paste(PIL.Image.fromarray(image, 'RGB'), ((col + 1) * h, (row + 1) * w))
return np.array(canvas)

# Generate video.
import moviepy.editor
mp4_file = 'results/interpolate.mp4'
mp4_codec = 'libx264'
mp4_bitrate = '5M'

video_clip = moviepy.editor.VideoClip(make_frame, duration=duration_sec)
video_clip.write_videofile(mp4_file, fps=mp4_fps, codec=mp4_codec, bitrate=mp4_bitrate)

import scipy

duration_sec = 60.0
smoothing_sec = 1.0
mp4_fps = 20

num_frames = int(np.rint(duration_sec * mp4_fps))
random_seed = 503
random_state = np.random.RandomState(random_seed)


w = 512
h = 512
style_ranges = [range(6,16)]

fmt = dict(func=tflib.convert_images_to_uint8, nchw_to_nhwc=True)
synthesis_kwargs = dict(output_transform=fmt, truncation_psi=0.7, minibatch_size=8)

shape = [num_frames] + Gs.input_shape[1:] # [frame, image, channel, component]
src_latents = random_state.randn(*shape).astype(np.float32)
src_latents = scipy.ndimage.gaussian_filter(src_latents,
smoothing_sec * mp4_fps,
mode='wrap')
src_latents /= np.sqrt(np.mean(np.square(src_latents)))

dst_latents = np.stack([random_state.randn(Gs.input_shape[1])])


src_dlatents = Gs.components.mapping.run(src_latents, None) # [seed, layer, component]
dst_dlatents = Gs.components.mapping.run(dst_latents, None) # [seed, layer, component]


def make_frame(t):
frame_idx = int(np.clip(np.round(t * mp4_fps), 0, num_frames - 1))
col_dlatents = np.stack([dst_dlatents[0]])
col_dlatents[:, style_ranges[0]] = src_dlatents[frame_idx, style_ranges[0]]
col_images = Gs.components.synthesis.run(col_dlatents, randomize_noise=False, **synthesis_kwargs)
return col_images[0]

# Generate video.
import moviepy.editor
mp4_file = 'results/fine_%s.mp4' % (random_seed)
mp4_codec = 'libx264'
mp4_bitrate = '5M'

video_clip = moviepy.editor.VideoClip(make_frame, duration=duration_sec)
video_clip.write_videofile(mp4_file, fps=mp4_fps, codec=mp4_codec, bitrate=mp4_bitrate)

if __name__ == "__main__":
main()
  1. fine_503.mp4:一个精细风格混合视频。

7 模型

7.1 动漫人脸

训练的基准模型的数据来源是上面的数据预处理和训练阶段介绍过。是一个在218794张动漫人脸上,使用512像素的StyleGAN训练出来的,数据时所有Danboru2017数据集上裁剪的,清洗、上采样,并训练了21980次迭代,38个GPU天。

下载(推荐使用最近的portrait StyleGAN,除非需要特别剪切的脸部)

8 迁移学习

特定的动漫人脸模型迁移学习到特定角色是很简单的:角色的图像太少,无法训练一个好的StyleGAN模型,同样的,采样不充分的StyleGAN的数据增强也不行,但是由于StyleGAN在所有类型的动漫人脸训练得到,StyleGAN学习到足够充分的特征空间,可以轻易地拟合到特定角色而不会出现过拟合。

制作特定脸部模型时,图像数量越多越好,但是一般n=500-5000足矣,甚至n=50都可以。论文中的结论

尽管StyleGAN的 generator是在人脸数据集上训练得到的,但是其embeding算法足以表征更大的空间。论文中的图表示,虽然比不上生成人脸的效果,但是依然能获得不错的高质量的猫、狗甚至油画和车辆的表征如果说连如此不同的车辆都可以被成功编码进人脸的StyleGAN,那么很显然latent空间可以轻易地对一个新的人脸建模。因此,我们可以判断训练过程可能与学习新面孔不太相关,这样任务就简单许多。

由于StyleGAN目前是非条件生成网络也没有在限定领域文本或元数据上编码,只使用了海量图片,所有需要做的就是将新数据集编码,然后简单地在已有模型基础上开始训练就可以了。

  1. 准备新数据集
  2. 编辑train.py,给-desc行重新赋值
  3. 正确地给resume_kimg赋值,resume_run_id="latest"
  4. 开始运行python train.py,就可以迁移学习了

主要问题是,没法从头开始(第0次迭代),我尝试过这么做,但是效果不好并且StyleGAN看起来可能直接忽视了预训练模型。我个人假设是,作为ProGAN的一部分,在额外的分辨率或网络层上增长或消退,StyleGAN简单的随机或擦除新的网络层并覆盖它们,这使得这么做没有意义。这很好避免,简单地跳过训练进程,直接到期望的分辨率。例如,开始一个512像素的数据集训练时,可以在training_loop.py中设置resume_king=7000。这会强行让StyleGAN跳过所有的progressing growing步骤,并载入全部的模型。如何校验呢?检查第一幅吐下你给(fakes07000.png或者其他的),从之前的任何的迁移学习训练完成,它应当看起来像是原始模型在训练结束时的效果。接下来的训练样本应该表现出原始图像快速适应(变形到)新数据集(应该不会出现类似fakes0000.png的图像,因为这表明是从头开始训练)

8.1 动漫人脸模型迁移到特定角色人脸

第一个迁移的角色是 Holo,使用了从Danboru2017的数据集中筛选出来的Holo面部图像,使用waifu2x缩放到512像素,手工清理,并做数据增强,从3900张增强到12600张图像,同时使用了镜像翻转,因为Holo面部是对称的。使用的预训练模型是2019年2月9号的一个动漫人脸模型,尚未完全收敛。

值得一提的是,这个数据集之前用ProGAN来训练的,但是几周的训练之后,ProGAN严重过拟合,并产生崩坏。
训练过程相当快,只有几百次迭代之后就可以看到肉眼可见的Holo的脸部图了。

StyleGAN要成功得多,尽管有几个失败的点出现在动漫人脸上。事实上,几百次迭代之后,它开始过拟合这些裂缝/伪影/脏点。最终使用的是迭代次数为11370的模型,而且依然有些过拟合。我个人认为总数n(数据增强之后),Holo应该训练训练更长时间(FFHQ数据集的1/7),但是显然不是。可能数据增强并没有太大价值,又或者要么多样性编码并没那么有用,要么这些操作有用,但是StyleGAN已经从之前的训练中学习到,并且需要更多真实数据来理解Holo的面部。

11370次迭代的模型下载

8.2 动漫人脸迁移到FFHQ人脸

如果StyleGAN可以平滑地表征动漫人脸,并使用参数$\omega$承载了全局的如头发长度+颜色属性转换,参数$\omega$可能一种快速的方式来空值单一角色的大尺度变化。例如,性别变换,或者动漫到真人的变换?(给定图像/latent向量,可以简单地改变正负号来将其变成相反的属性,这可以每个随机脸相反的版本,而且如果有人有编码器,就可以自动地转换了)。

数据来源:可以方便的使用FFHQ下载脚本,然后将图像下采样到512像素,甚至构建一个FFHQ+动漫头像的数据集。
最快最先要做的是,从动漫人脸到FFHQ真人脸的迁移学习。可能模型无法得到足够的动漫知识,然后去拟合,但是值得一试。早期的训练结果如下,有点像僵尸
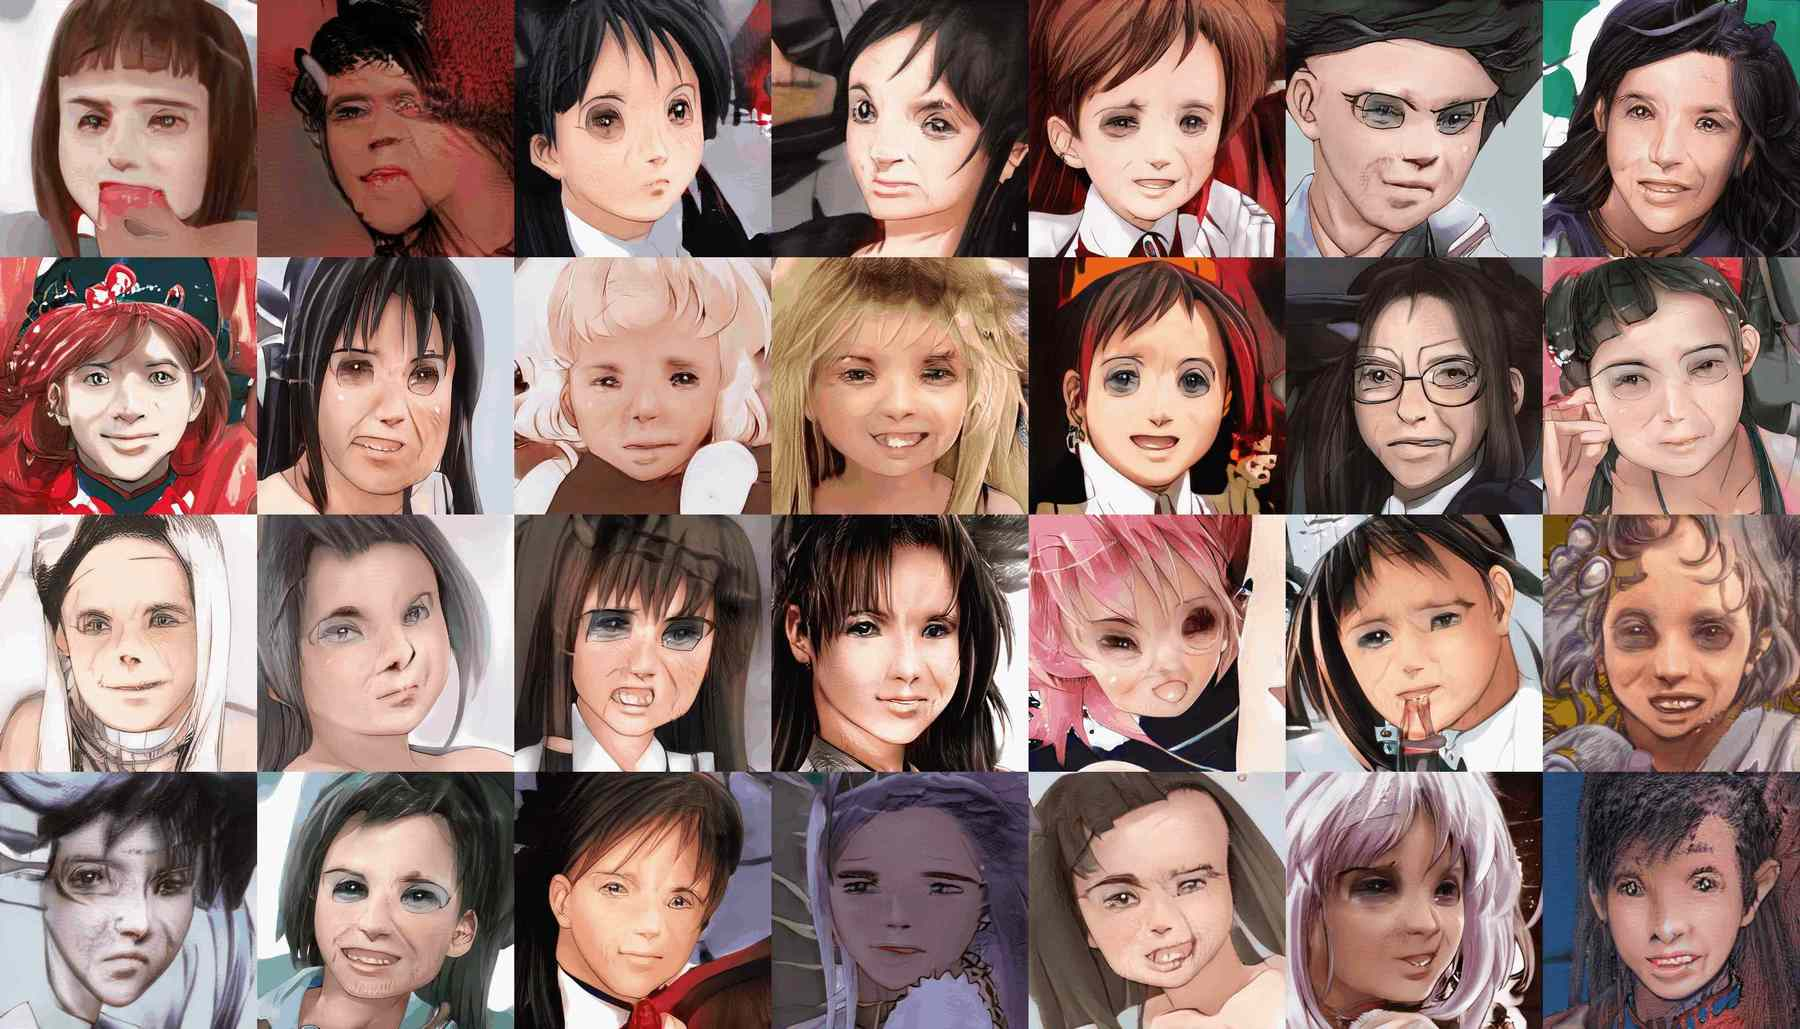
97次迭代(ticks)之后,模型收敛到一个正常的面孔,唯一可能保留的线索是一些训练样本中的过度美化的发型。
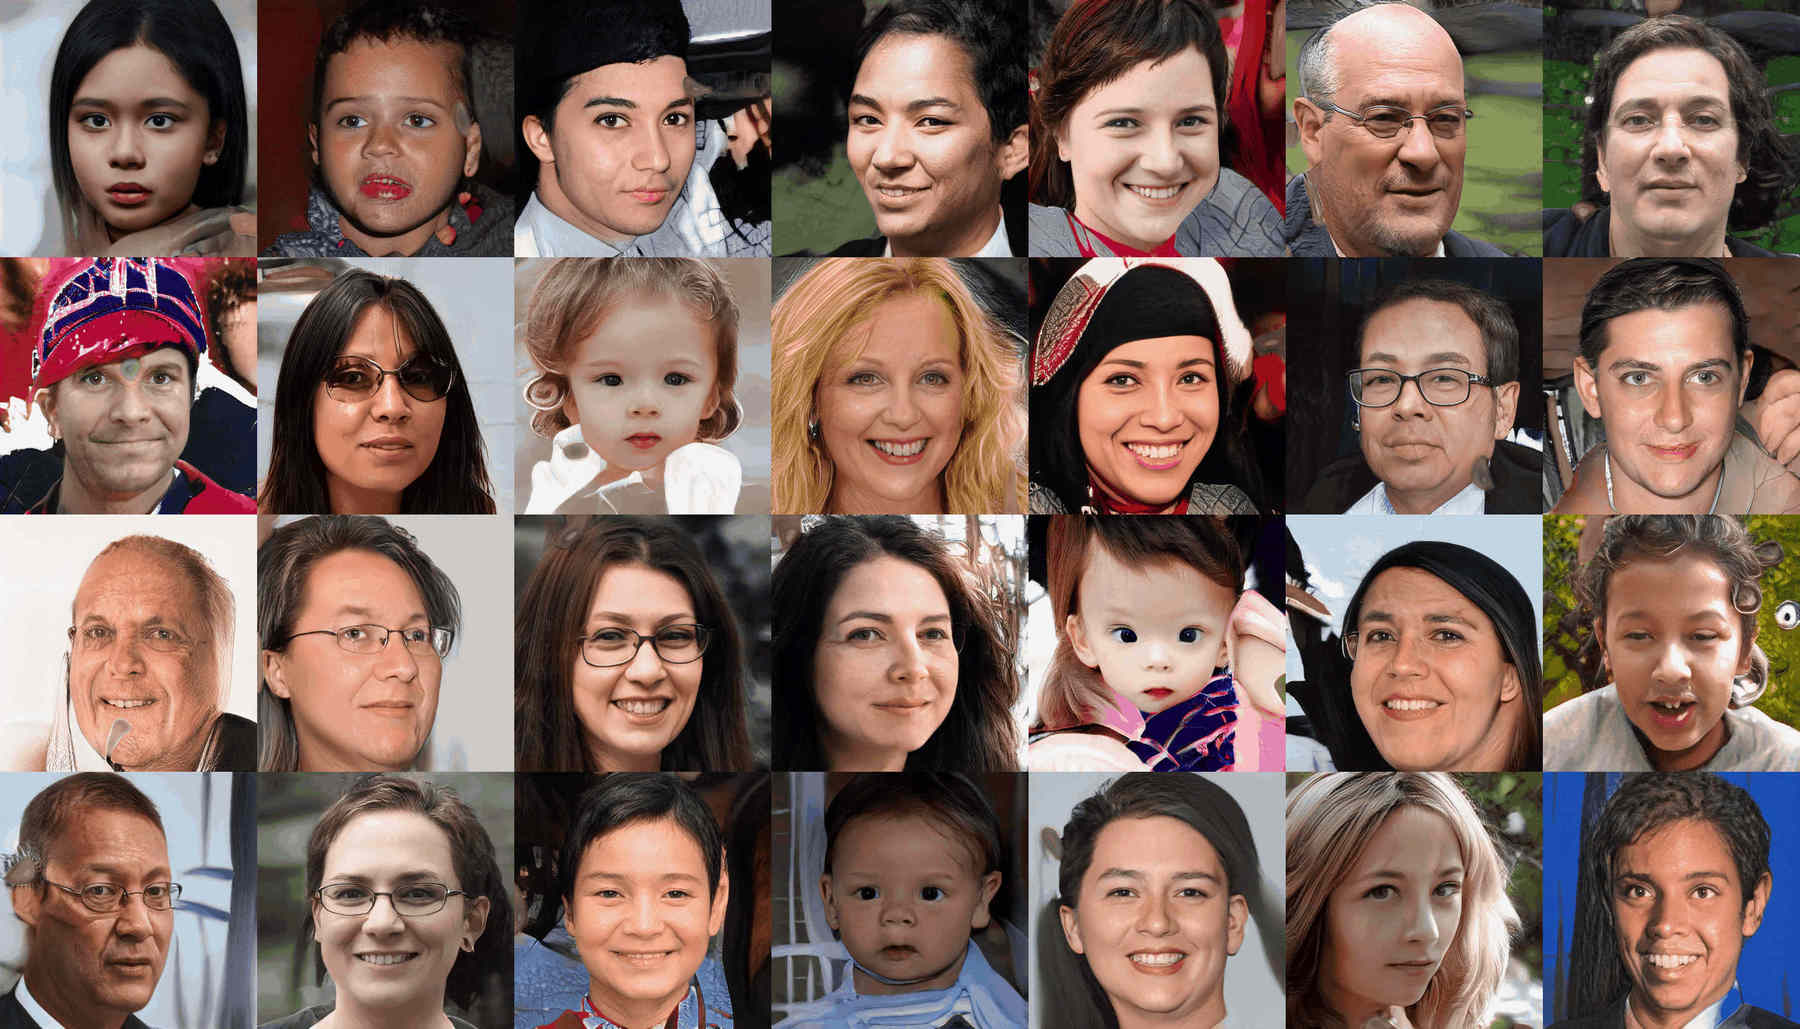
8.3 动漫脸–>动漫脸+FFHQ脸

下一步是同时训练动漫脸和FFHQ脸模型,尽管开始时数据集的鲜明的不同,将会是正的VS负的$\omega$最终导致划分为真实VS动漫,并提供一个便宜并且简单的方法来转换任意脸部图像。

简单的合并512像素的FFHQ脸部图像和521像素的动漫脸部,并从之前的FFHQ模型基础上训练(我怀疑,一些动漫图像数据仍然在模型中,因此这将会比从原始的动漫脸部模型中训练要快一点)。我训练了812次迭代,11359-12171张图像,超过2个GPU天。

它确实能够较好地学习两种类型的面孔,清晰地分离样本如下
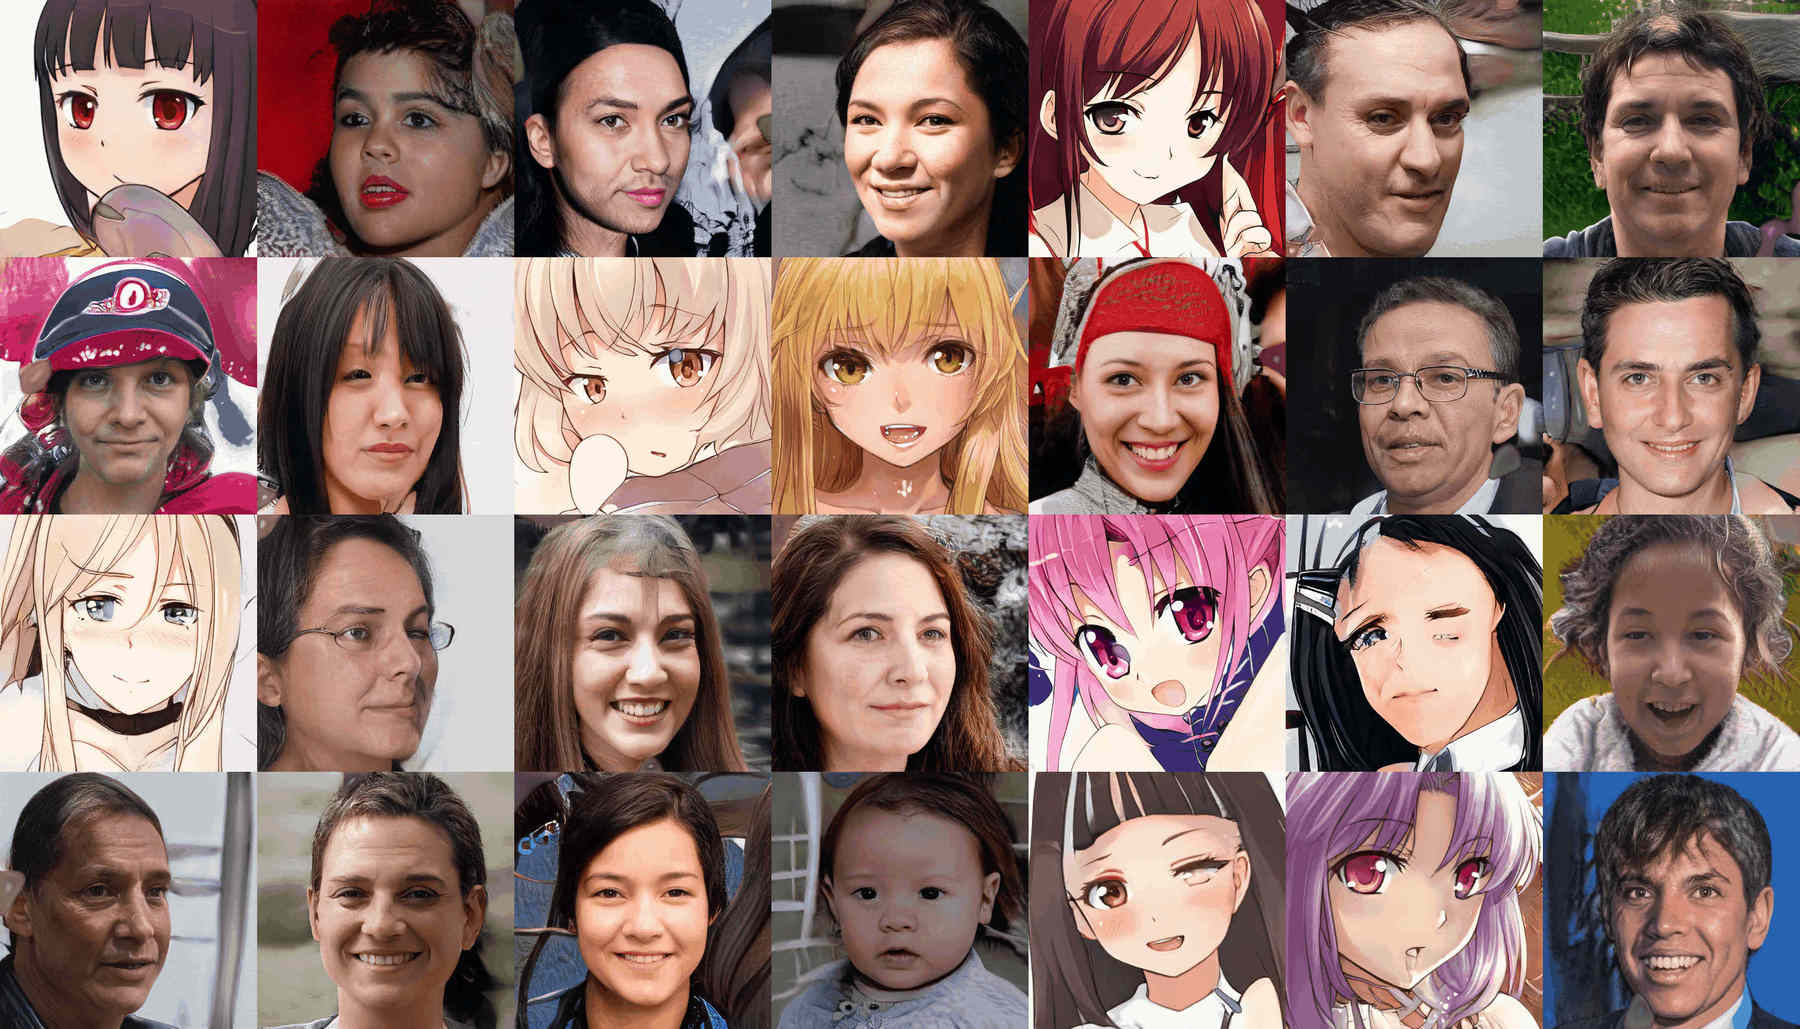
但是,迁移学习和$\omega$采样的结果是不如意的,修改不同领域的风格混合,或者不同领域之间的转换的能力有限。截断技巧无法清晰地解耦期望的特征(事实上,多种$\omega$ 没法清晰对应什么)。
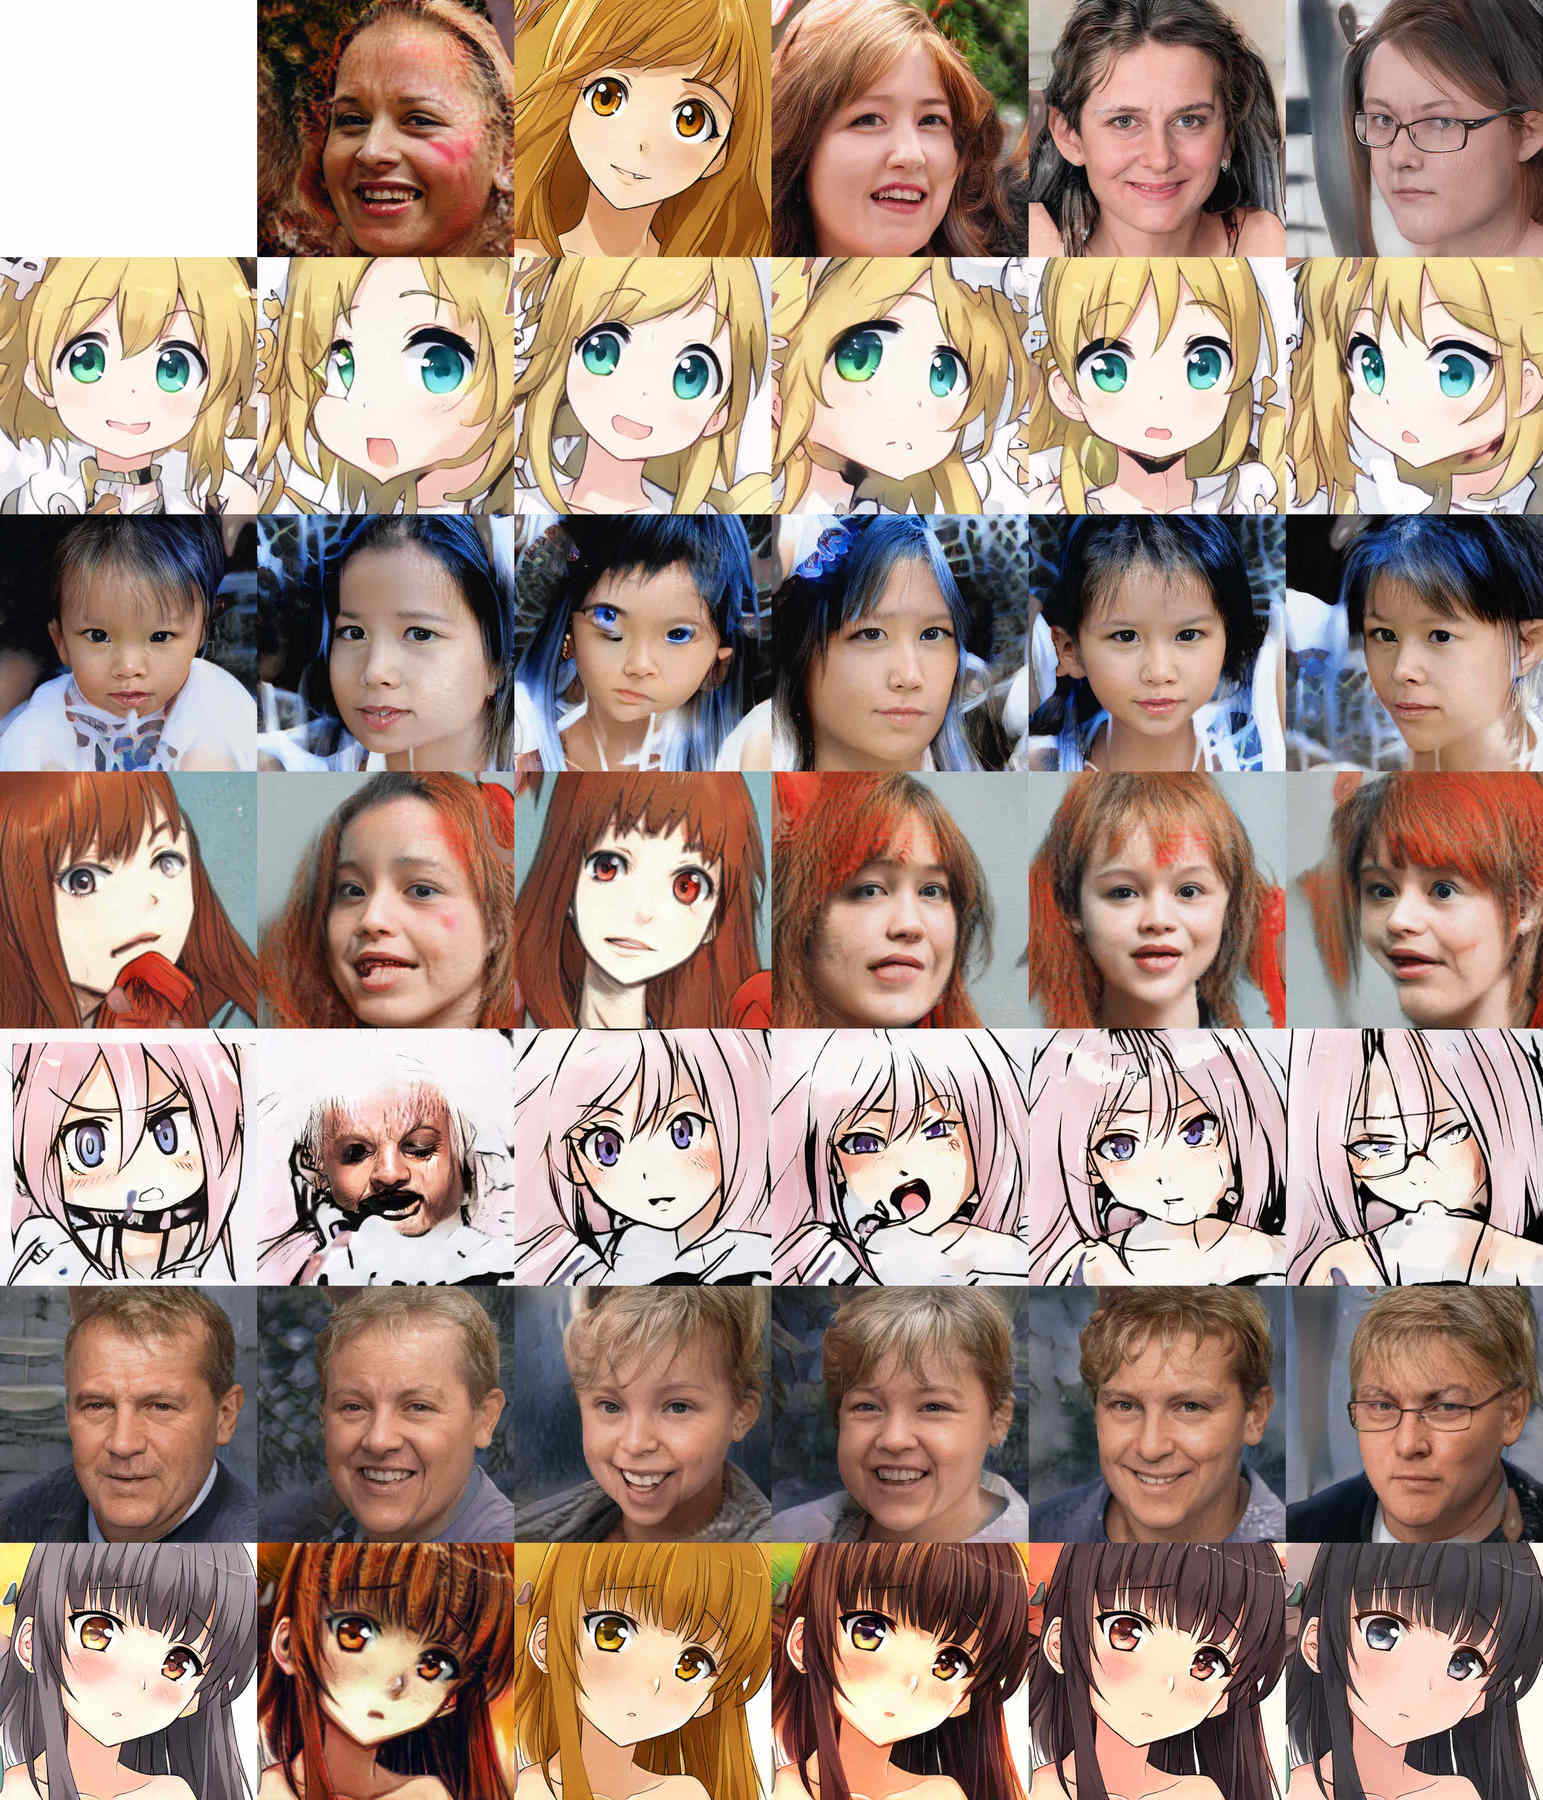
StyleGAN的动漫+FFHQ的风格混合结果。

9 逆转StyleGAN来控制和修改图像

一个非条件GAN架构,默认是单向的:latent向量z从众多$N(0,1)$变量中随机生成得到的,喂入GAN,并输出图像。没有办法让非条件GAN逆向,即喂入图像输出其latent。

最直接的方法是转向条件GAN架构,基于文本或者标签embeding。然后生成特定特征,戴眼镜,微笑。当前无法操作,因为生成一个带标签或者embedding并且训练的StyleGAN需要的不是一点半点的修改。这也不是一个完整的解决方案,因为它无法在现存的图像进行编辑。

对于非条件GAN,有两种实现方式来逆转G。

  1. 神经网络可以做什么,另外一个神经网络就可以学到逆操作。Donahue 2016,Donahue Simonyan 2019.如果StyleGAN学习到了$z$到图像的映射,那么训练第二个神经网络来监督学习从图像到$z$的映射,